
10 Solar System Installation Tips for Global Buyers
Buying solar equipment across borders can look simple: compare panel ratings, check prices, and arrange delivery. In practice, a successful solar system installation depends on climate, roof structure, grid rules, and local technical support. A panel tested in a cool European climate may perform differently under tropical heat, dust, or coastal salt. Global buyers need more than attractive specifications.
This guide presents ten practical installation tips based on common project experience and established industry practices. It explains how to assess energy demand, verify component quality, review warranties, and select qualified installers. It also considers inverters, battery storage, shading, cable protection, monitoring systems, and future maintenance. Small details matter. A poorly sealed cable entry can allow water into a building. An undersized inverter can restrict expected output during peak sunlight.
Reliable planning starts before any purchase order. Buyers should request clear datasheets, safety certifications, performance guarantees, and installation references. Local professionals can confirm whether equipment suits regional electrical requirements and weather conditions. Manufacturer claims deserve careful checking. They are not always the whole story.
No project is perfectly predictable. Roof measurements may be incomplete, delivery schedules may change, and actual energy use may differ from estimates. Good planning leaves room for those weaknesses. It also records assumptions, inspection results, and decisions for later review. With careful preparation, international buyers can reduce avoidable costs, improve system safety, and achieve more dependable long-term energy performance.
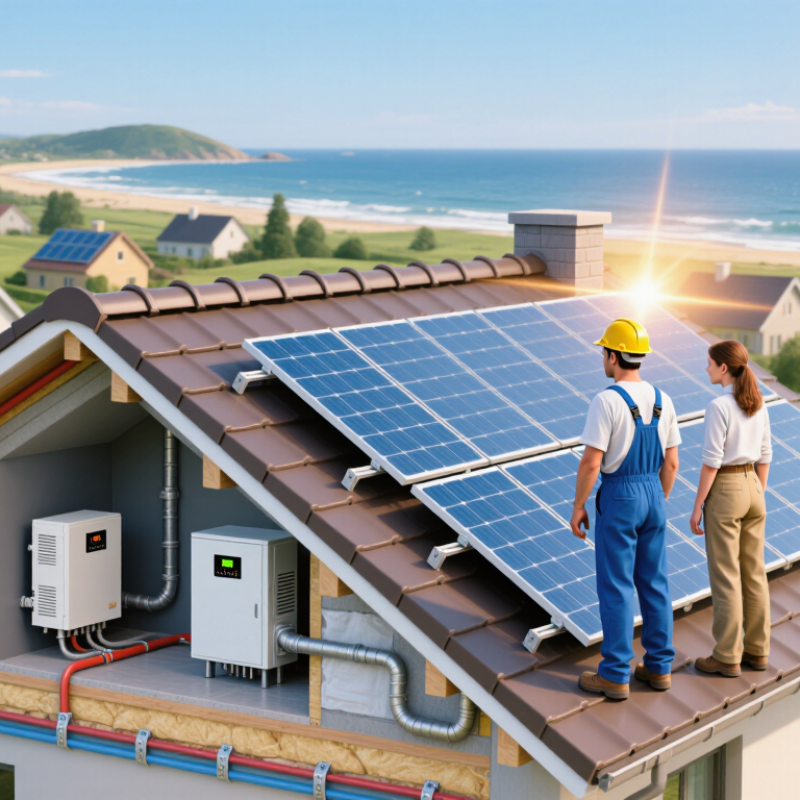
Assessing Site Conditions and Local Solar Potential
Before ordering equipment, inspect the site at different times of day. A clear roof at noon may face shadows by late afternoon. Check nearby trees, chimneys, parapets, dust, roof age, drainage, and access for maintenance. The World Bank’s Global Solar Atlas provides long-term solar radiation maps at about 250-metre resolution. Use this data for screening, not final design. Local shading can reduce energy production sharply.
Measure roof orientation, tilt, usable area, and structural condition. Record temperatures, because heat lowers photovoltaic output. NREL’s PVWatts documentation identifies temperature, soiling, wiring, and inverter losses as important performance factors. In dry or agricultural regions, dust may require more frequent cleaning. Coastal projects also need corrosion-resistant installation details. I would not trust a single satellite estimate. Compare it with a year of local weather data, when available, and conduct a shading survey. Small mistakes remain possible. That matters. A practical assessment should also confirm grid voltage, export limits, fire access, and local permitting requirements before procurement. International Energy Agency Photovoltaic Power Systems Programme reports show that performance depends on system design, operation, and site conditions, not sunlight alone.
| No. | Assessment Dimension | Key Measurements or Questions | Typical Reference Data | Recommended Buyer Action | Assessment Status |
|---|---|---|---|---|---|
| 1 | Local Solar Resource | Estimate annual global horizontal irradiation and average peak sun hours for the installation location. | Many locations receive approximately 2–7 kWh/m²/day of daily solar irradiation, depending on latitude, climate, altitude, and season. | Use a long-term solar resource database or a professional solar assessment. Size the system using annual and monthly irradiation rather than one clear day. | Essential |
| 2 | Roof or Ground Orientation | Check the direction of the available roof plane or ground-mount structure and identify any east–west alternatives. | In the Northern Hemisphere, a south-facing array generally receives the most annual sunlight; in the Southern Hemisphere, a north-facing array is generally preferred. | Prioritize the least-shaded orientation, but compare annual energy yield because a slightly different orientation may provide better morning or afternoon production. | Essential |
| 3 | Tilt Angle | Measure the existing roof pitch or determine the adjustable mounting angle for a ground installation. | For fixed systems, an angle close to the site latitude is a common starting point for maximizing annual energy, although local weather and seasonal demand can change the optimum. | Request an energy-yield comparison for the proposed tilt, especially in regions with heavy winter demand, seasonal monsoons, or high summer electricity use. | Important |
| 4 | Shading and Obstructions | Inspect trees, neighboring buildings, chimneys, parapets, utility structures, and future construction risks. | Even partial shade can reduce the output of affected modules and may increase mismatch losses. A shade study should cover the full annual sun path. | Complete a horizon or 3D shade analysis. Consider module-level power electronics or separate electrical strings only when the design justifies the additional cost and complexity. | Essential |
| 5 | Roof Structural Capacity | Verify roof age, framing condition, waterproofing, attachment points, and allowable dead and live loads. | Solar modules commonly weigh about 10–25 kg/m² before accounting for mounting hardware, ballast, wind uplift, and maintenance loads. The actual value varies by system design. | Obtain a site-specific structural review. Do not rely only on roof area; confirm load capacity and attachment suitability with local engineering requirements. | Essential |
| 6 | Wind, Snow, and Seismic Exposure | Identify the local basic wind speed, snow load, exposure category, flood risk, and seismic design requirements. | Mounting and anchoring requirements are determined by local building codes and site exposure. High-wind and high-snow regions may require reinforced rails, closer attachment spacing, or steeper designs. | Use site-specific structural calculations and certified mounting components. Confirm that the design covers uplift, sliding, snow accumulation, corrosion, and seismic movement where applicable. | Essential |
| 7 | Temperature and Climate | Record the local minimum and maximum temperatures, humidity, rainfall, dust, salt exposure, and ventilation conditions. | Typical crystalline-silicon module power temperature coefficients are approximately −0.3% to −0.5% per °C above the module reference temperature. Hotter modules generally produce less power. | Check module temperature ratings, inverter operating limits, ventilation gaps, environmental protection ratings, and corrosion resistance for the local climate. | Important |
| 8 | Available Area and Layout | Measure usable length, width, roof setbacks, access paths, fire lanes, drainage zones, and equipment clearances. | The usable area is always smaller than the gross roof area because of setbacks, obstructions, walkways, edge clearances, and maintenance access. | Prepare a scaled layout before purchasing equipment. Reserve space for inverters, disconnects, batteries, cable routes, ventilation, and safe maintenance access. | Important |
| 9 | Electrical and Grid Conditions | Confirm utility voltage, frequency, phase arrangement, service capacity, grounding method, meter configuration, and interconnection rules. | Common low-voltage grid systems include approximately 120 V or 230 V nominal service and 50 Hz or 60 Hz frequency, but exact requirements vary by country and utility. | Select grid equipment only after confirming local certification and utility requirements. Check whether export limits, anti-islanding protection, or an interconnection study is required. | Essential |
| 10 | Cleaning, Access, and Maintenance | Evaluate dust, pollen, bird activity, rainfall, snow, cleaning water availability, roof access, and monitoring connectivity. | Soiling losses vary widely by environment. Dry, dusty, agricultural, industrial, and coastal sites can require more frequent inspections or cleaning than areas with regular rainfall. | Create a maintenance plan based on measured performance and site conditions. Provide safe access, drainage protection, inspection intervals, and a method for monitoring production anomalies. | Recommended |
Related Posts
-
What Is the Best Type of Solar Energy Installation in 2026?
-
How to Choose China Top Solar Energy Installation Suppliers?
-
2026 Best Solar Energy Installation Types for Global Buyers
-
How to Choose Solar Power Installation Suppliers?
-
Top 10 Solar Power Solutions for Global Buyers Who Need Them?
-

Challenges Faced During Solar Installation and Their Impact on Efficiency